
02 Aug Mold Behind Bathroom Tiles: A Homeowner’s Guide to Detection and Removal (2026)
Did you know that approximately 47% of homes in the United States have visible mold or a detectable mold odor? It’s a staggering figure that highlights a common frustration for homeowners: no matter how much you scrub, those dark spots on the grout keep coming back. If you’re dealing with a persistent musty smell despite a deep clean, you’re likely facing a structural moisture failure rather than a simple hygiene issue. The reality is that the most dangerous growth is often the mold behind bathroom tiles, where it can quietly compromise your home’s integrity and your family’s respiratory health.
We understand the anxiety that comes with hidden property damage. You need a solution that goes beyond a temporary fix. This guide provides a methodical framework to help you identify the warning signs of subsurface growth and safely investigate the conditions behind your shower walls. You’ll learn the technical “why” behind recurring mold and gain the clarity needed to decide between a DIY repair or professional remediation. By following this structured approach, you can transition from a state of uncertainty to a fully restored, healthy bathroom environment.
Key Takeaways
- Understand why surface treatments fail to reach the root of mold behind bathroom tiles and how the “moisture sandwich” fuels hidden growth.
- Learn to recognize the structural warning signs, such as hollow-sounding tiles and persistent odors, that signal a compromise in your wall cavity.
- Master a safe investigation protocol that utilizes basic containment to prevent cross-contamination while performing a visual inspection.
- Explore advanced remediation techniques, including thermal imaging and moisture meters, that ensure a thorough resolution without unnecessary demolition.
Why Mold Keeps Returning to Your Bathroom Tiles
Many homeowners in the Long Beach area view mold as a surface-level nuisance, yet recurring growth often points to a much deeper structural problem. This is known as the “Iceberg Effect” in the restoration industry. What you see on your grout lines is merely the visible tip of a larger, more complex colony. When mold behind bathroom tiles establishes itself, the visible spots are often just the overflow of a significant infestation occurring within the wall cavity. With nearly 47% of U.S. homes experiencing some form of mold or dampness, the issue is more common than many realize.
Timing is a critical factor in this biological process. According to EPA guidelines, mold can begin to colonize damp surfaces within 24 to 48 hours of initial moisture exposure. To understand the underlying mechanics of how mold grows indoors, one must look at the combination of organic food sources, such as drywall paper or wood studs, and the consistent humidity found in poorly ventilated bathrooms. Once these spores take root behind the tile, they aren’t just sitting on the surface; they’re actively digesting the structural components of your home.
The Cleaning Paradox: Why Scrubbing Isn’t Enough
The common response to seeing dark spots is to reach for bleach or retail sprays. However, this often creates a “cleaning paradox” that inadvertently worsens the situation. Grout is a highly porous material that acts like a wick, drawing moisture and spores deep into the substrate. While bleach might remove the pigment from the surface mold, it doesn’t penetrate deep enough to kill the roots. It’s a persistent cycle that leaves the source untouched.
In fact, heavy scrubbing can push moisture and cleaning agents further into the wall. This doesn’t resolve the issue; it simply forces the mold into a temporary dormant state. As soon as the next shower provides fresh humidity, the colony reactivates and pushes back through the grout. This cycle explains why homeowners find themselves cleaning the same spots every weekend without achieving a permanent resolution. To stop the growth, you have to address the moisture trapped in the wall substrate itself.
Local Climate Factors in Southern California
Our local environment in coastal communities like Seal Beach and Long Beach adds another layer of complexity. High ambient humidity from the Pacific Ocean makes it difficult for bathrooms to dry out completely between uses. This constant moisture load is a primary driver for mold behind bathroom tiles. In older homes throughout Lakewood and Wilmington, original construction often lacks the advanced waterproofing membranes found in modern builds.
Salt air can also degrade older sealants and caulking over time, creating microscopic entry points for water. Once capillary action pulls water through these cracks, it becomes trapped in a “moisture sandwich” between the tile and the wall framing. Without professional-grade ventilation or updated moisture barriers, these older Southern California homes remain particularly vulnerable to hidden environmental hazards that require a methodical approach to resolve.
The Science of Moisture Intrusion: How Mold Reaches the Wall Cavity
Understanding how mold behind bathroom tiles develops requires a technical look at the “moisture sandwich.” This refers to the layered assembly of your shower wall: the decorative tile, the porous grout, the backer board substrate, and finally, the wooden framing. While tiles are waterproof, the system as a whole is often vulnerable. Hydrostatic pressure in a shower environment occurs when the force of falling water pushes liquid through microscopic gaps in tile joints and grout. Once water bypasses the surface, it becomes trapped against the framing, creating an ideal incubator for spores.
Capillary action further complicates this by pulling water through hairline grout cracks, much like liquid moving up a straw. Even high end waterproofing membranes like RedGard or Schluter systems can fail over time, particularly if the house settles or if the original installation was not perfectly sealed at the seams. When these barriers are breached, moisture remains locked in the wall cavity without a path for evaporation. This persistent dampness is the primary driver of health problems caused by mold, as it allows colonies to grow undisturbed for months before any outward signs appear.
Structural Weak Points in Your Shower
Most moisture intrusion begins at the “change of plane,” which are the corners where walls meet or where the wall meets the floor. If the caulk in these areas is not 100% silicone or has begun to pull away, it creates a direct highway for water. In our local coastal environment, salt air can accelerate the degradation of these sealants. Plumbing penetrations for showerheads and mixing valves are also common entry points. Many older Cerritos homes use “green board” (moisture resistant drywall) instead of true cement board. While green board resists some humidity, it eventually dissolves when exposed to direct liquid, providing a rich organic food source for mold.
Hidden Leaks vs. Surface Seepage
It is vital to distinguish between surface seepage and hidden mechanical failures. Pinhole leaks in copper pipes behind the wall can spray a fine mist for years without a visible drip. Similarly, steam condensation can build up inside the wall cavity if the top of the shower enclosure isn’t properly sealed. Poor subfloor drainage often leads to the development of mold behind bathroom tiles on the bottom row, as water pools behind the wall rather than flowing into the pan. If you suspect your shower system has been compromised, a professional plumbing and moisture assessment can identify the exact breach point before structural damage occurs.
5 Warning Signs of Hidden Mold Growth Behind Shower Walls
Identifying mold behind bathroom tiles requires looking beyond the surface. While a few dark spots might seem like a minor cleaning issue, specific sensory and physical indicators suggest a systemic failure within the wall cavity. Persistent musty or earthy odors that intensify immediately after a hot shower are a primary red flag. This occurs because the steam rehydrates the subsurface colony, causing it to release microbial volatile organic compounds (mVOCs) into the air. If the air feels “heavy” or smells like decaying wood even after the room has dried, the source is likely tucked behind your tiles.
Physical changes in the tile installation provide concrete evidence of substrate decay. If you tap on a tile and hear a hollow “clicking” sound, it often indicates that the thin-set mortar has detached from the backer board due to chronic moisture. In advanced cases, tiles may feel “spongy” or shift slightly when pressed. This is a severe warning sign that the underlying framing or cement board has lost its structural integrity. Additionally, if black or orange stains reappear on your grout within days of a deep scrub, you aren’t just dealing with surface dirt; you’re seeing the overflow of an active colony of mold behind bathroom tiles.
You should also inspect the opposite side of the bathroom wall. Water often migrates through the wall cavity, causing bubbling paint or discoloration on the drywall in the adjacent hallway or bedroom. These symptoms are frequently the first outward signs of a leak that has been brewing for months. Ignoring these signals can lead to significant structural damage that requires professional intervention to resolve safely.
Visual Clues You Shouldn’t Ignore
Grout that is crumbling or turning to powder is a sign that the binder is failing due to constant saturation. This breakdown allows even more water to seep into the wall, accelerating the growth cycle. You might also notice discolored drywall near the baseboards or ceiling in the rooms sharing a wall with the shower. These symptoms often coincide with a need for water damage restoration in Long Beach, especially when the moisture has begun to affect the home’s subflooring or floor joists.
The ‘Sniff Test’ and Air Quality
Differentiating between a general “wet dog” smell and active mold growth is crucial for your home’s health. Active mold has a sharp, pungent scent that lingers even when the room is relatively dry. Because of the serious health effects of mold exposure, including respiratory irritation and asthma triggers, ignoring these scents can be a risk to your family. If you are concerned about the health risks of mold from water leak exposure in your home, scheduling professional indoor air quality testing is a methodical way to confirm the presence of airborne spores and ensure your indoor environment is safe. If the odor remains persistent despite proper ventilation, scheduling professional indoor air quality testing is a methodical way to confirm the presence of airborne spores and ensure your indoor environment is safe.

How to Safely Investigate and Address Mold Behind Tiles
Investigating potential mold behind bathroom tiles requires a methodical approach to ensure you don’t cross-contaminate the rest of your home. Before you disturb any surface, you must establish basic containment. The goal of a safe investigation is to confirm the presence of growth without releasing millions of spores into your living space. We recommend the “Single Tile” removal method for a controlled visual inspection. By carefully removing the grout around one suspected tile, typically one that sounds hollow or is near a plumbing fixture, you can peer behind the substrate without a full-scale demolition.
Once the tile is removed, use a flashlight to inspect the condition of the backer board and the wooden studs. If you discover active growth, document the findings immediately with high-resolution photographs. These images serve as critical evidence for insurance claims or as a baseline for professional restorers. If you uncover a significant colony of black or dark green mold, stop your investigation immediately. Seal the opening with 6-mil plastic sheeting and painter’s tape to isolate the area until a professional can evaluate the extent of the damage.
DIY Investigation Safety Protocols
Your personal safety is the highest priority during any moisture investigation. At a minimum, you must wear an N95 respirator, non-porous gloves, and unvented safety goggles to prevent spore inhalation or contact. Isolate the bathroom by taping plastic sheeting over the doorway and any HVAC vents. One of the most common mistakes homeowners make is using a fan to dry out a suspicious area. This action is dangerous; it creates air currents that distribute spores throughout the house, turning a localized issue into a whole-home contamination problem.
When to Stop and Call the Professionals
Knowing when to transition from a DIY check to a professional response is vital for your property’s health. The U.S. Environmental Protection Agency (EPA) recommends that any mold growth covering more than 10 square feet should be handled by trained professionals. If you see signs of structural rot, such as crumbling 2×4 framing or wood that feels soft to the touch, the integrity of your home is at risk. Attempting to scrub or remove these materials without specialized equipment can lead to a failed remediation. Understanding the risks of toxic mold remediation is essential for anyone dealing with long-term moisture failure. If the scope of the damage exceeds your comfort level, scheduling a comprehensive mold and moisture assessment will provide the technical resolution needed to restore your bathroom safely.
Professional Mold Remediation: Restoring Your Bathroom’s Health
When the presence of mold behind bathroom tiles is confirmed, the focus must shift from investigation to methodical resolution. At Coastline Environmental Solutions, Inc., we reject the “total demolition” approach often favored by general contractors who prioritize speed over precision. Our methodology centers on targeted remediation, which involves identifying the exact boundaries of the moisture failure to preserve as much of your original bathroom as possible. By focusing on the specific areas of contamination, we provide a cost-effective solution that maintains the structural integrity of your home while ensuring a complete return to safety.
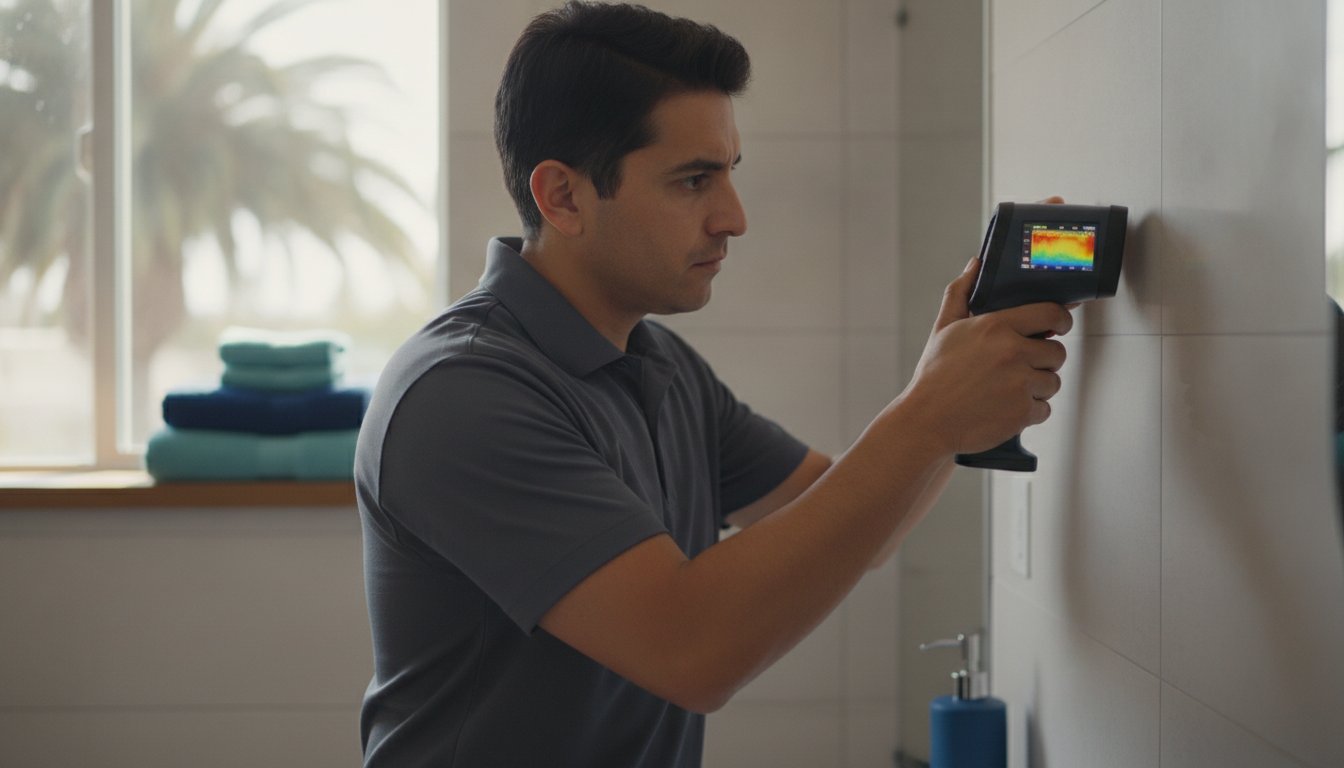
Our technicians utilize advanced diagnostic technology to map hidden moisture without unnecessary destruction. High-resolution thermal imaging cameras allow us to see temperature differentials behind the tile surface, pinpointing active leaks or trapped condensation. We pair this with non-invasive moisture meters to establish a scientific baseline of the substrate’s condition. This technical data ensures that we aren’t just guessing where the mold ends; we are following the moisture trail to its source, providing a thorough solution that prevents the “Iceberg Effect” from recurring. For property owners throughout the region, our mold remediation orange county services apply these same precision diagnostics to ensure complete moisture mapping across all affected areas.
Safety during this process is non-negotiable. To protect your family and the rest of your property, we establish rigorous containment zones using 6-mil poly sheeting and industrial-grade HEPA filtration. By creating negative air pressure within the work area, we ensure that any spores disturbed during the removal of mold behind bathroom tiles are captured by our air scrubbers rather than migrating into your HVAC system or living areas. This controlled environment is essential for maintaining indoor air quality throughout the restoration process.
Adhering to these rigorous safety and technological standards is a hallmark of top-tier restoration companies across the country. For homeowners seeking similar expertise in the Mid-Atlantic region, you can learn more about Triangle Legacy Flood Restoration & Carpet Cleaning and their methodical approach to disaster recovery and property health.
The Remediation Process Step-by-Step
The first phase of our technical response involves isolating the bathroom and activating air scrubbing equipment. Once containment is verified, we perform a controlled removal of contaminated porous materials, such as mold-impacted drywall, insulation, and wood-based backer boards. Non-porous surfaces like studs and framing are then treated with EPA-registered biocides to neutralize any remaining microbial activity. The final step involves industrial-grade structural drying protocols, ensuring the wall cavity reaches a dry standard before any new materials are installed.
Long-Term Prevention Strategies
A permanent resolution requires more than just removal; it requires changing the environment that allowed the mold to thrive. We recommend upgrading to high-efficiency, humidity-sensing ventilation fans that automatically exhaust moisture before it can settle into grout lines. When re-tiling, the use of epoxy grouts provides superior moisture resistance compared to traditional cement-based options. For ongoing maintenance, professional tile and grout services—like those offered at andersoncarpetcleaninginc.com—can provide the deep cleaning and sealing necessary to prevent moisture from seeping into the substrate. Finally, we encourage homeowners to schedule regular indoor air quality assessments. These proactive check-ups ensure that your bathroom remains a healthy, mold-free space for years to come.
Securing Your Home Against Hidden Moisture
Resolving mold behind bathroom tiles requires a transition from simple observation to methodical action. As we’ve explored, the key to protecting your property lies in addressing the root moisture source rather than just scrubbing the surface. By prioritizing precision detection and structural drying, you ensure that your bathroom remains a safe, resilient environment for your family while avoiding the high costs of total demolition. Taking these steps now protects your home’s integrity and your indoor air quality.
Coastline Environmental Solutions, Inc. has served as a trusted local guardian in Long Beach and Huntington Beach for over 40 years. Our certified mold remediation experts are available with 24/7 emergency service to handle even the most complex hidden moisture failures with technical precision. Suspect mold behind your tiles? Contact Coastline Environmental Solutions, Inc. for a professional inspection today. We’re committed to providing the specialized expertise and methodical care needed to restore your home to a healthy state of normalcy.
Frequently Asked Questions
Can I just paint over moldy bathroom tiles or grout?
No, painting over mold is a cosmetic fix that fails to address the biological growth underneath. Trapping spores behind a layer of paint creates a pocket of moisture that allows the colony to expand undisturbed. Eventually, the mold will cause the new paint to bubble, peel, or discolor, often resulting in more extensive damage to the substrate than if the issue had been resolved properly at the start.
How much does it typically cost to remove mold behind shower tiles?
The total investment for remediation depends heavily on the extent of the structural damage and the size of the affected area. While surface-level cleaning is a minor expense, resolving mold behind bathroom tiles often involves removing the wall substrate and treating the underlying framing. Factors such as the need for specialized containment and the complexity of the plumbing repairs required to stop the moisture source will influence the final project scope.
Is mold behind tiles covered by my homeowner’s insurance?
Coverage generally depends on whether the moisture source was “sudden and accidental” or the result of gradual wear. If a pipe burst behind the wall, many policies will cover the resulting remediation. However, if the mold developed over several years due to failing grout or poor maintenance, insurance providers often classify it as a preventable issue and may deny the claim. It’s best to review your specific policy’s environmental endorsements.
How long does the professional mold remediation process take?
Most professional remediation projects are completed within three to five business days. This methodical timeline allows for the proper setup of HEPA-filtered containment, the careful removal of contaminated materials, and a dedicated structural drying phase; you can learn more about these technical protocols by reviewing the standards followed by Floodsafe Restoration LLC. Rushing the process can leave residual moisture in the wall cavity, which almost guarantees that the mold will return once the new tiles are installed.
Can mold behind tiles cause health problems even if I can’t see it?
Yes, hidden mold colonies can impact your health by releasing microscopic spores and microbial volatile organic compounds (mVOCs) into the air. These contaminants can travel through wall outlets or gaps in the trim, circulating throughout your home. Individuals with asthma or respiratory sensitivities may experience symptoms like coughing, sneezing, or skin irritation even if there is no visible growth on the bathroom surfaces. Understanding the full scope of health risks of mold from water leak situations can help you take proactive steps to protect your family before symptoms escalate.
Should I use a dehumidifier if I suspect mold behind my tiles?
A dehumidifier is a helpful supportive tool, but it cannot resolve an active infestation. While reducing ambient humidity to below 50% can slow the spread of new spores, it won’t reach the moisture trapped in the “moisture sandwich” behind your wall substrate. To permanently stop mold behind bathroom tiles, you must identify the physical breach in the waterproofing and remove any saturated organic materials.
What is the difference between surface mildew and structural mold?
Mildew is a superficial fungus that grows on non-porous surfaces and can usually be wiped away with standard household cleaners. Structural mold is much more invasive; it sends hyphae, or roots, deep into porous materials like drywall and wooden studs. While mildew is an aesthetic issue, structural mold actively digests the building materials of your home, leading to wood rot and compromised wall integrity over time.
How do I know if the mold has spread to the floor joists or subfloor?
Warning signs of spread include “bouncy” or soft spots in the bathroom floor and visible water stains on the ceiling of the room directly below. Professionals use non-invasive moisture meters and borescope cameras to inspect these tight cavities. If the moisture has reached the subfloor, the remediation process must expand to include these structural components to ensure the entire moisture plume is neutralized and dried.